Monday, July 27, 2009

Mt. Talapia...I mean Tamalpais.

hello hello!

This weekend C and I took a "staycation" and did a day-trip up to Marin to hike in Mt. Tamalpais park. It was gorgeous! We brought a nice picnic lunch in our backpack of sourdough bread, cheese, nectarines and a couple of those fiber muffins. I didn't do any cooking this weekend (hence the "staycation") so there aren't any recipes to post. We did check out some new restaurants in the city which were awesome. We went to this great little Italian place in Russian Hill on Friday night. I was very pleased to hear the waitress recommend the exact same meal/wine combo I ordered to the table next to us. I guess I'm getting better at my wine pairings! We also checked out this new French/Japanese fusion place called Swell. The food was AMAZING. We both agreed we had never had such inventive cuisine in our lives. The only catch is that the food is very light so don't go there after a day of hiking looking for a heavy carb-laden meal.

Here are a few photos from our hike:

Photobucket
We happened upon a Greek-style amphitheather. They actually do performances of plays here in the summer...not sure what is playing this season!

Photobucket
A clearing with a giant rock...

Photobucket
There were lots of beautiful redwood trees.

Photobucket
The trail.

Photobucket
The trail ran right along a creek which continued to build up and eventually there were bridges and waterfalls etc. It was amazing!

Photobucket
Devil-Deer.

Photobucket
View from the trail...

Photobucket
A recently fallen redwood...straight into the creek.

Photobucket

After the hike we decided to drive to the top of the mountain. It was quite a drive considering I hadn't driven in months...I almost had a heart attack when a bicyclist passed me on the right flying down the hill at over 30mph.

Photobucket
We were way above the fog-line!

Photobucket
Woo!

Sunday, July 19, 2009

hello stranger

I am hesitant to say strangers plural because I'm not convinced I have more than one reader. But I bring it upon myself by not posting with regularity!

To tell the truth things have just been incredibly busy "offline". Since the last post I have: visited my folks in LA, jumped from a rope swing into a lake, done Vegas right, beat my boyfriend at Monopoly (VICTORY!!!!!!!! FINALLY!), hosted an event for Minor Details Productions in SF, had a few friends visit me in the bay, been to the gym a lot, pulled an ab muscle, got an REI membership, spent time with a few old friends, purchased a new couch (ok I haven't purchased it yet, but I've shopped around and will be buying this week!), read an entire series of horrifically embarrassing books, started Julia Child's memoir, played frisbee golf, and watched a lot of Star Trek. Oh summer!

And onto some cookery!

The theme of the next two recipes is using what you already have.

I think I used this recipe from Williams-Sonoma.com and sort of modified it using what I had around.

Photobucket

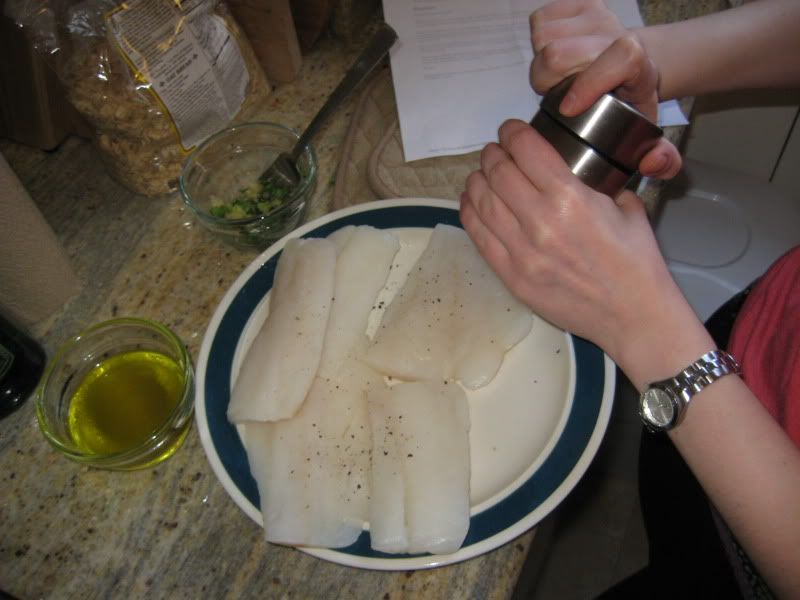
I seasoned the fish with salt, pepper, crushed garlic and olive oil. I believe I used halibut here but any mild white-fish should be fine.

Photobucket

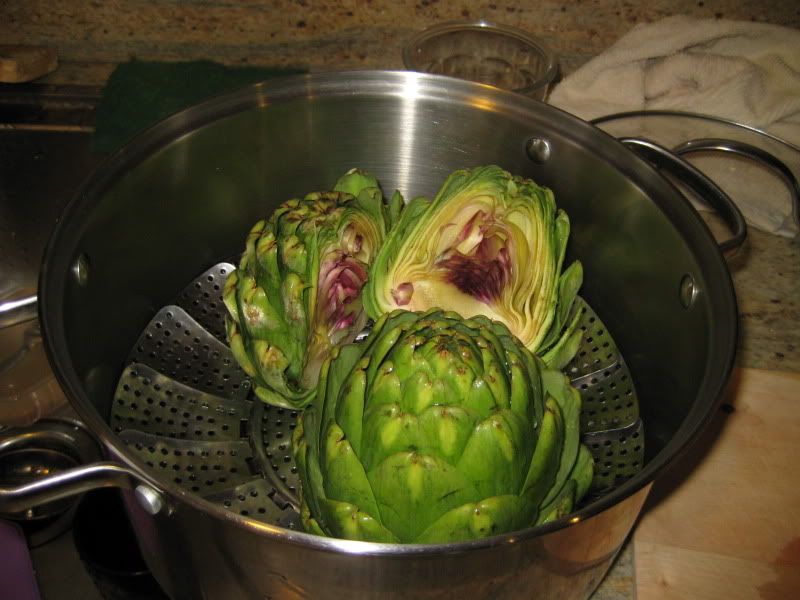
I also went to the Farmer's Market that day and picked up some gorgeous artichokes. I sliced them in half (purely for looks) and then steamed them for about 45 minutes. To tell when the 'choke is ready, use a pair of tongs and try to pluck off a leaf. If it is easy to remove the artichokes are ready!

Photobucket

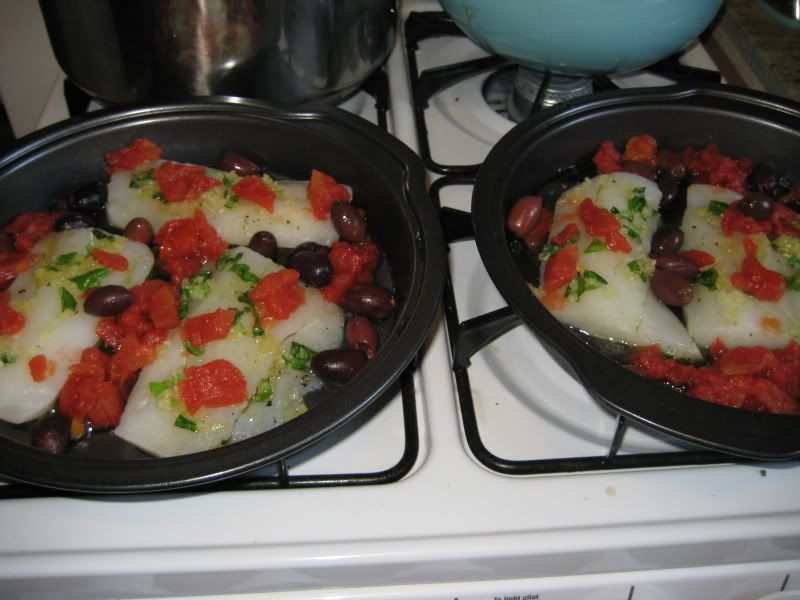
I like this recipe because it is basically self contained. I added some canned tomatoes, Kalamata olives and fresh basil. I believe I used a broth/Chardonnay combo as liquid and then covered the pans with tin foil to poach the fish. It's great because you can drink the rest of the wine with the meal.

Photobucket

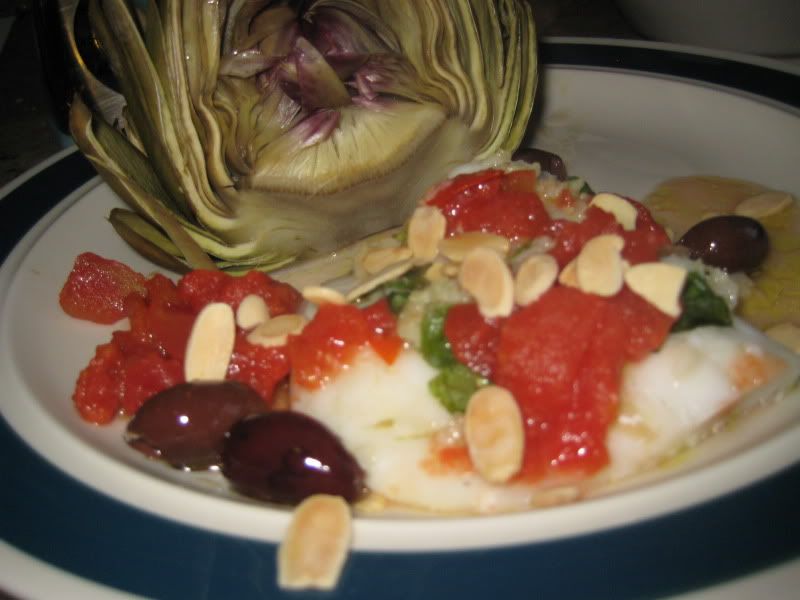
The WS recipe calls for pine nuts but I had sliced almonds and I thought that they worked fine. All in all quite delicious!

This next dish I kind of made up. I had some asparagus from the Farmer's Market and some left over ricotta cheese and lasagna noodles from a dinner party I had earlier. I decided to try my hand at some individual lasagnas.

Here is what I used (the amounts will vary depending on how much you want to make):
a few lasagna sheet noodles
1 bunch asparagus
1/2 small container of ricotta cheese
dried basil
dried oregano
1/2 jar pre-made marinara sauce
1/2 can diced tomatoes
some pre-grated parmesan

Photobucket

First I sliced off the tough ends of the asparagus, coated them in olive oil and salt/pepper. Then I roasted them in the oven at 450 until tender. At the same time you should boil your lasagna noodles.

Next, I took the ricotta cheese and added some oregano and dried basil to taste. I also took some canned marinara sauce and added some canned tomatoes I had leftover from the fish dish above. I often like to add whatever I have to pasta sauce to sort of "beef it up" (except without the beef...you get the idea).

Photobucket

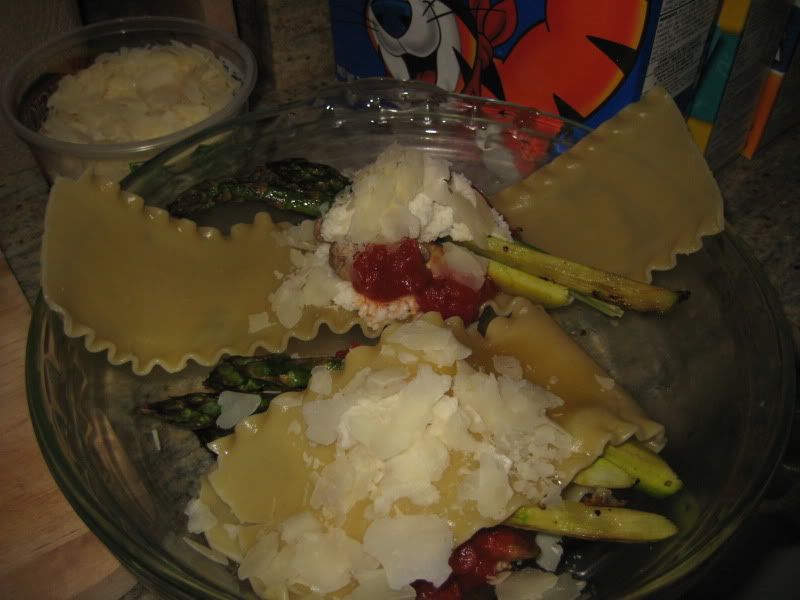
To assemble, I laid out a lasagna noodle, plopped down a little sauce, added a few spears of asparagus, plopped down a spoonful of ricotta and then a little more sauce and a sprinkle of parmesan. Then I folded it all up nice and cute and added a drizzle of sauce/parmesan on top.

Once they were all assembled, I baked them in the oven at 350 until they got all nice and melty.
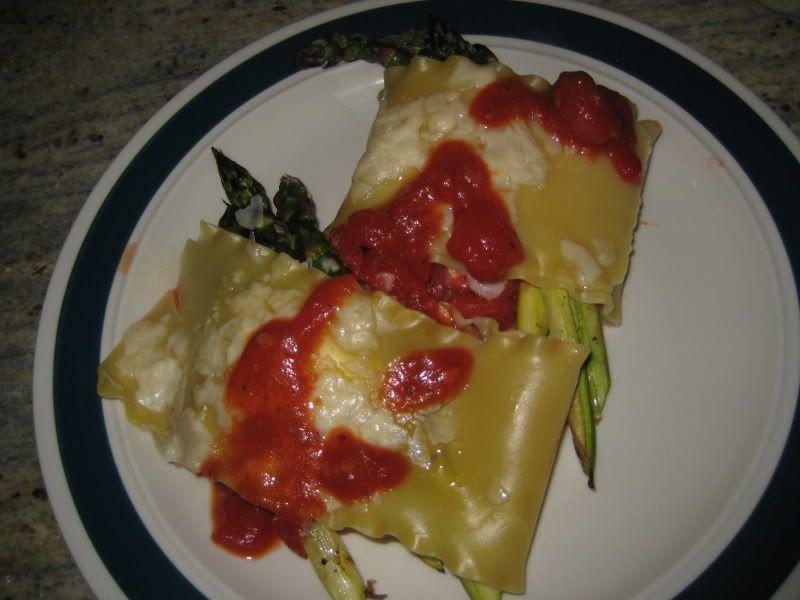
Photobucket

Ta da!

Assessment: You need a lot of asparagus to make these really great. I felt that with just a spear or two they were a little...lacking. I think I've seen this done with prosciutto. Next time I think I'll add some sauteed mushrooms or some other kind of vegetable to make it a little more filling/interesting. Maybe some sauteed or even frozen spinach could also work.

And lastly (this does not go with the theme of using what you have around) I thought I'd introduce you all to my favorite muffin recipe. These muffins are amazing. They are pretty tasty, only have 100 calories each and are full of fiber! C and I make these almost every week and both bring them to work as snacks. They are AMAZING. I always do a double-recipe because they freeze incredibly well. If you are looking for a guilt-free, portable and healthful snack you gotta check these out. I also adore that these are "guilt-free", yet do not contain any artificial ingredients. However, please note that these will NOT taste like a starbucks honey-bran muffin. These are not sweet. If you want a little sweetness, they are great heated up in the oven or micro with a drizzle of honey on top. (Adding a little honey on top doesn't add too many calories!)

The recipe is fairly self explanatory so I'll only throw in a few tips.

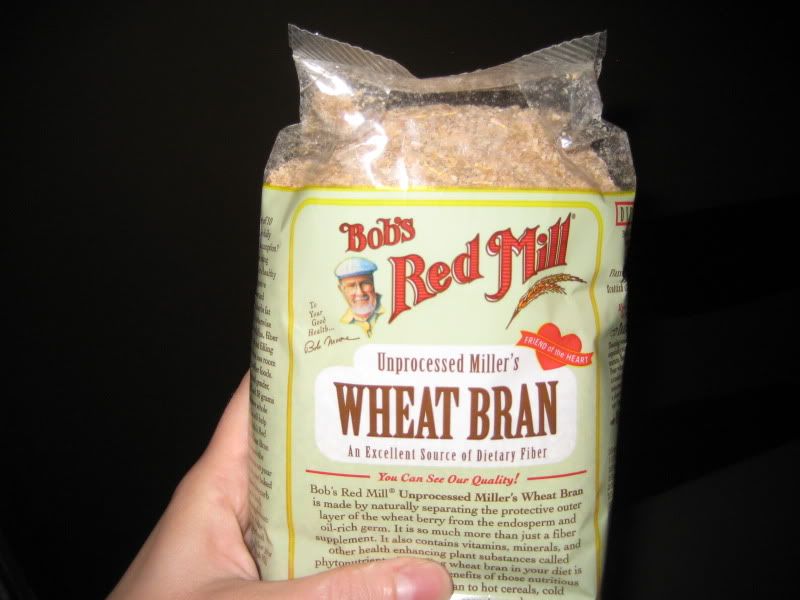
First of all, you may be wondering where to get the wheat bran. I've found Bob's Red Mill Wheat Bran to work really well. This bran is available at all Whole Foods stores and at some Safeway/Ralphs type stores. It looks like this:
Photobucket

To mash the banana I usually just put it on a plate and use a potato masher. It should end up with the consistency of baby food.
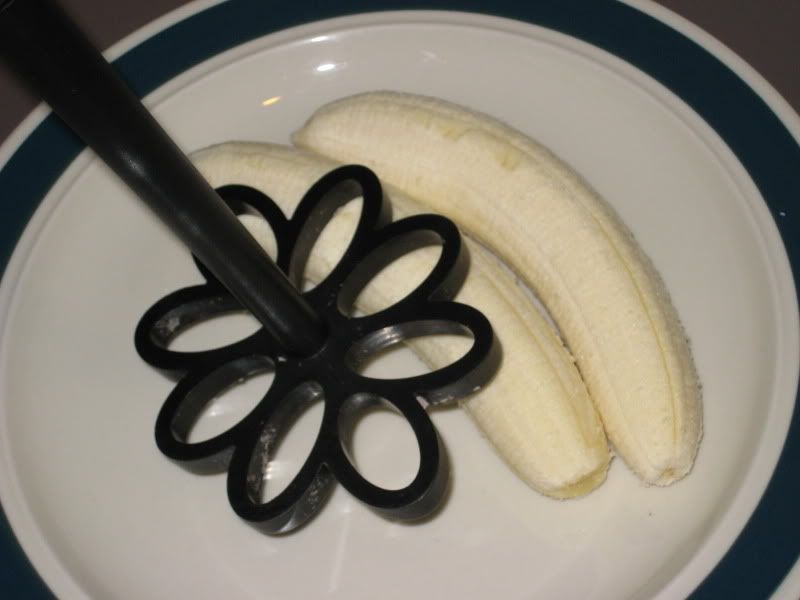
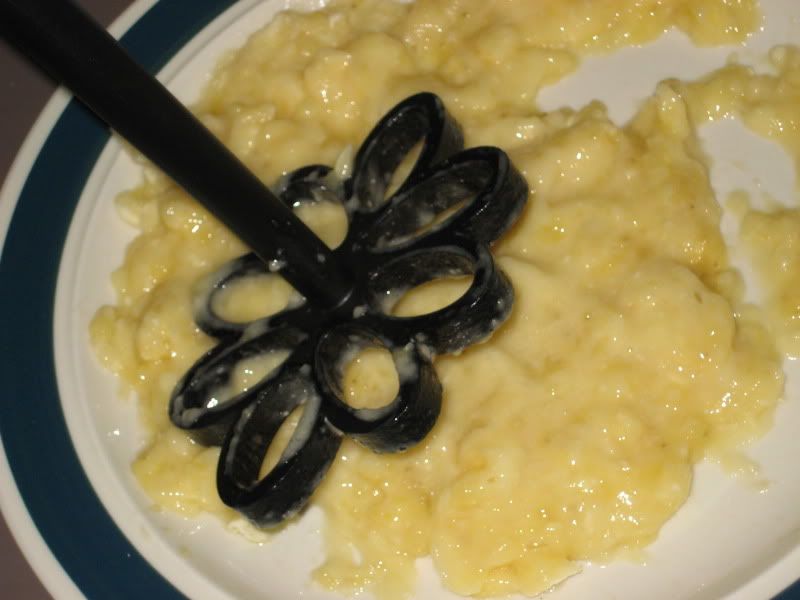
Photobucket

Photobucket
mmmmmm!

I just made the muffins and they are still in the oven so there are no photos of the finished product!

Alright, time for me to make dinner, do laundry and get ready for the week.

PS: here is the couch we are going to get (most likely)! We're thinking grey instead of this greenish color.
Photobucket
I think it looks cute in this photo, but it looks even better in person. And it's SUPER comfortable. The tall arms make it great for lounging/reading. Woo!


Monday, May 11, 2009

sigh


www.dailydanny.com (discovered via Apartment Therapy)
It's times like these I wish I owned my fridge...


Sunday, May 10, 2009

"I could write a blog...I have thoughts!"

Couldn't have put it better myself.

I can tell this will be my favorite movie of the year.


Ironically, I've never actually cooked anything by Julia Child. Though I do own her cookbook...perhaps I too should embark on a "recipe a day" challenge!

off topic

Dear WaMu/Chase/Whatever the hell you are called these days:

I cannot log into my online banking account. I apparently have forgotten my login name.

I see that I can only retrieve my login name from the telephone customer service...and this brings me to my complaint disguised as a general inquiry because I did not see COMPLAINT as an option.

Your telephone "customer service" is the worst I have ever experienced in my entire life. All I need to do is speak to a human being. I understand this is a lot to ask these days. However, you claim to have customer service 7 days a week. I did not receive any service. For some reason my account number and social security number followed by the pound sign are not working. Therefore I can not be ROUTED to an operator so I just keep getting redirected to the original recording. I tried to pretend to open a new account thinking I would HAVE to be able to speak to a human being who could then manually connect me to your online support. But no! Your sales department is closed! So there is not 7 day a week service after all. Fabulous! You should not advertise having customer service available 7 days a week when it is NOT actually available. I understand if you want to be closed on Sundays! Just say so instead of wasting my time.

I understand that this message will most likely never be read by a human being, and if it is, I understand that the human being reading this will have absolutely no power to change anything at all. So, to answer the question that has surely entered your mind by now: YES. I only wrote this to make myself feel better. And YES, I DO feel better taking out my frustrations in this little box.


Thank you and I hope you are having a better Sunday than I am.

-Katherine


Yes, I did actually send this. And yes, I do feel much better ;-)

Monday, May 4, 2009

Down to business - 2 Recipes & a Craft

It's business time.

Recipe #1 - Basic Risotto how-to

No recipe link here...this is a dish I make quite often so I just kind of do it from my memory. I'll do my best to write it out for you. The nice thing about risotto is that it's great for vegetarians because you can always add meat on the side and it's great for those who are gluten-intolerant because it's all rice. You can use whatever veggies you have on hand.

Ingredients:
Arborio Rice (it will double in size as you add the broth)
1 yellow onion
garlic (either finely chopped, or run through a garlic press)
parmesan/parm reggiano cheese or a mix of both
1 Tetra-Pak veggie or chicken broth (though it never hurts to have extra)
1/2 cup dry white wine (I like to use extra dry Vermouth. Martini and Rossi preferred)
Various vegetables: My favorites are asparagus, mushrooms, tomatoes, fresh basil, but you can really do anything...butternut squash, zucchini etc.
Extra Virgin Olive Oil
1 large wok-type pan
1 small saucepan (to heat the broth)


First you should cook up your vegetables. In this case, I steamed the asparagus and sauteed the mushrooms in olive oil. When they are done, just put them aside on a plate to add at the end.

Photobucket

Now chop up the onion and peel a few gloves of garlic. Pour your broth into a saucepan and turn on low. This is an ESSENTIAL step. The broth must be hot in my experience or else your rice will turn out all mushy and weird.

Pour a liberal amount of olive oil in the pan and saute the garlic for a couple minutes until nice and fragrant. Add the onions and saute for about 5 minutes, do not let them brown/caramelize.

Photobucket

Next, add a few more tablespoons of olive oil and stir in your rice. Saute the rice in the oil for about 3-5 minutes. They say the rice should appear "transparent" over time...I've never noticed this effect.

Next add the wine to your taste and simmer until it is all absorbed. Your stove should be on about medium heat. Do not let the rice "cook dry" thus sticking to the bottom of the pan. This is not a "set it and forget it" meal.

Add the broth about a half a cup at a time letting it fully absorb before you add more. Give the rice a few stirs. There is no need to constantly stir as that can create mushy rice, but make sure the broth is evenly distributed.

Photobucket

Taste the rice as you go...it should be firm to the bite but not raw. The rice should be about double in size. When the rice is done, turn off the stove and add any spices you like. I am a fan of the obvious salt/pepper but also fresh basil (or dried) and even a little oregano or rosemary. Then add the cheese. I add a lot of cheese because cheese is DELICIOUS.

Photobucket
It should melt quickly. Fold it into the risotto.

Lastly, add your vegetables and you're done!
Photobucket
Yum!

Recipe #2 - Curried Cauliflower ala Williams-Sonoma
Click here for the recipe.

I used this basic recipe, but added half a yellow onion, a couple of tomatoes, three red potatoes and frozen peas to make it a full meal. I also cooked up some brown jasmin rice on the side. Perfect!

Photobucket
Beautiful cauliflower from the Farmer's Market and other veggies from my corner-store.

I chopped up all the ingredients and then poured them into a big salad bowl. I then sifted the spices through and mixed them up with my hands. Finally, I spread them in a single layer on a couple of baking sheets and cooked at 425F for about 45 minutes. The recipe says that it should only take about 30, but potatoes always take forever.

Photobucket
Take the veggies out every once and awhile to turn them. If they start to stick (which mine did) you can give them a quick spray of cooking spray (I use Pam Organic Olive Oil).

Then I mixed up the sauce which was just yogurt and dijon mustard. I was a bit skeptical about the sauce...never had THAT at an Indian restaurant, but it turned out to really compliment the dish! I didn't add all of it though.

Photobucket

Photobucket
Ta da! Aside from the fact that it takes a long time to roast the veggies, this was a very easy and delicious dinner! It was especially good because I don't often cook Indian. I just realized that this was also a gluten-free dinner...I am accidentally on a roll.


AND FINALLY...a craft update. So after discovering those felted coasters I decided to take a stab at felting myself. I discovered this adorable little yarn store near the Marina called Greenwhich Yarn. Super cute, very helpful ladies, great selection and it's been there for 30 years. A bit far away, but totally worth it. I walked all the way back (about 2 miles) and it was super fun...great walk through a few fun neighborhoods.

At first I wanted to make placemats, but then I decided to try something smaller since I'm just experimenting. I opted for hot-pads.

These were quick to knit up. I did them in an afternoon. I used size 15 needles, and double stranded the yarn (one verigated and one solid). I cast on 30 stiches and used a basic stockinette stich.

The end result pre-felting:
Photobucket

I washed the pieces twice on the hot cycle at my local laundromat. Unfortunately, I just don't think the water got hot enough because they didn't shrink nearly as much as I thought they would. I think I'm going to try and refelt them again the next time I do laundry. Or maybe try another laundromat. Even better...maybe I'll have to mooch off a couple of friends who are LIVING THE DREAM and have their own in-unit laundry. Someday...

The end result post felting:
Photobucket

Photobucket

They're a bit large and a bit square. But still kind of fun. I'm happy to be back into knitting and I'm looking forward to more trying out some more felting projects. I also think I'm going to crochet a cute border and a knob-loop on these so I can actually use them in the kitchen.

What else should I felt?


Hiking Yoga

So before I launch into cooking/crafting, I wanted to do a quick life-update.

This Sunday I went to "free yoga" at Lulu Lemon Athletica. This is a very risky activity for someone like myself. Now you might be thinking this is dangerous because I have weak knees or something, but no...it is far worse...I have a weak sense of willpower when it comes to overpriced workout clothes. You see, Lulu Lemon is incredibly expensive, but also incredibly cute and fun. I realize that the people behind Lulu are pretty smart. It is rarely a "free" yoga class for most of the attendees. After all, you're spending an hour in the store...surrounded by their products being taught yoga by instructors wearing the clothes and everyone is so friendly...and then they ask you if you have any questions and all of a sudden you find yourself in the dressing room with 3 pairs of stretch pants and a $50 sports bra. Oh yes, it is a great marketing tactic.

When under retail attack I normally resort to one of humanity's natural defensive instincts: Fight or Flight. In the case of weekly yoga, I choose Flight and book it out of the store as fast as you can say "Namaste". (Note: this strategy has worked flawlessly, I realize I have not EVER purchased something from Lulu Lemon.)

This brings me to the actual point of this post. This week, instead of our usual class in the store, we did something a little (read: a LOT) different. When I walked into the store with my mat this rainy Sunday morning I was greeted with, "Oh good, you wore your running shoes. This week we aren't doing regular yoga. We're doing HIKING YOGA!"

Gulp.

What is hiking yoga you ask? It is yoga-bootcamp. A 90 minute, intense power walk/run (in the rain!) through the hilliest part of San Francisco then pausing at the top of a mountain to do a bunch of yoga poses.

In conclusion, I survived. It was a very intense workout but it was really really fun. Everyone was really great and the instructor was fabulous and encouraging. I even met a really nice girl who is a fellow knitter and classic movie/musical lover! Yay for new friends. Also, I am proud to say that I kind of kicked butt on this hike. I definitely ran up one of the longest, steepest blocks in the city, leaving the group in the dust and was applauded by a complete stranger who happened to be standing on the corner.

I guess walking uphill everyday is paying off!

Saturday, May 2, 2009

really?

This company can charge $72 for 3 felted COASTERS???? REALLY? I am clearly in the wrong business.

Now they are quite cute as you can see here:
Photobucket

I mean, they have the nifty "five green stitches" which are kind of cool and asymmetrical and then there is the little grommet so you can loop them all together or something. But these really do seem incredibly over priced. (Especially because they have a little disclaimer saying that these coasters are not appropriate for setting a tea kettle on DESPITE THE PHOTO.)

And yet, they clearly seem to sell! I have heard of this brand before on numerous web-blogs and they are having a sample sale at the Fort Mason Center today. Are the hipster-yuppies aka huppies that well off and/or that lacking in knowledge of a basic craft that used to be a mandatory skill just 50 years ago that they will pay this much for a circle that has been thrown in the washing machine?

Now I am no knitting master, but I have been known to pick up ye olde needles once and awhile, so maybe there is something more to these than meets the eye?

I sincerely doubt it.

In other news, happy Saturday all!

Sunday, April 26, 2009

Arts & Crafts

So my new favorite spin on the classic "dinner party ala KT" is the Painting Party. Wine, good food, good conversation, and paints. Here are a few of the results from painting parties past and my own endeavors at home. It's been awhile since I've painted seriously, but I am steadily getting back into it and am enjoying the journey.

Photobucket Photobucket

Photobucket Photobucket

Photobucket

Some photograph better than others...

Adventures in Baking: Apple and Berry Galette

2 posts in 1 day! That's what I call commitment! ;-)

So as I mentioned earlier today, my boss's birthday is tomorrow so I'm bringing in breakfast treats. I came upon this recipe on williams-sonoma.com (my go-to site for all things extravagant). It came up in my search for breakfast foods...but it looks (and smells) an awful lot like a fruit pie. Oh well, I'm just going to roll with it and claim it's a breakfast food and not a dessert. But really, who doesn't like pie for breakfast?

All in all, this is a pretty simple recipe. I think it looks a lot more intimidating/challenging than it is. I'll admit it was a bit time consuming, but not too tricky. I'd definitely recommend this recipe for anyone looking to bring something to a party that will be sure to majorly impress.

I'll let you read the recipe online for measurements and specific directions etc., however, I took some photos to illustrate the key steps. Oh yes, and as you'll see from the recipe this is supposed to be an Apple and CRANberry Galette, but seeing as it is not Thanksgiving I was unable to find cranberries ANYWHERE. I settled on a frozen berry medley of raspberries, blackberries and blueberries. I didn't want anything too sweet (such as strawberries) in an effort to keep the idea of apple cranberry.

The recipe says to use a food processor (thank goodness I just bought one!) to mix up all the dry ingredients and the butter. I think that this could also be done in a standing mixer if that's what you have around.

Photobucket
dry ingredients/butter

next you have to mix the sour cream with the water and then sprinkle on top of the dry ingredients/butter and pulse until sticky.

Photobucket
kind of looks/smells like sour milk. yum.

Photobucket

Photobucket
once you get all the dough out of the food processor, wrap it tightly in plastic wrap and refrigerate. The recipe says to refrigerate for 20 mins, but I think you could even do this step a day or two before and the dough would still be ok.

While the dough is chilling, peel/slice/core the apples. Be sure you are using Granny Smith apples because they are tart. This is the most time consuming step of the whole recipe. As you'll see below, I use a handy dandy crank tool and it makes the slicing process go by in a snap. If you make apple pies or anything like this more than twice a year I would HIGHLY recommend buying one of these gadgets. It is worth every penny. I think Williams-Sonoma, Sur La Table and Pampered Chef all sell them. I've had mine for almost 10 years and it's still perfect. I think it's historically a Quaker design...

I digress.

Check out this baby in action:

Photobucket

Photobucket

Photobucket

Photobucket
Next we disolve the sugar, honey, lemon juice and cinamon in a little water on the stove and then add the apples and simmer for awhile.

Photobucket
looks and tastes like apple pie filling...

Photobucket
use a slotted spoon to fish out the apples and set them aside

Photobucket
I then added the frozen berry medley to the sugar/apple juice and cooked for a few minutes. After those are done, just add the berries to the apple mix and then simmer the juice until they thicken and become a nice syrupy red color. Add the juice to the fruit.

Time to roll the dough!

When baking I like to set up a little work area on the kitchen table as seen here.
Photobucket

Flour your surface, then cut the big ball of dough in half. Use your hand to press the dough into a pancake shape then take the roller to it. (Repeat for both halves of the dough.)

Photobucket

Photobucket

Photobucket
Spoon half the berry mixture in the center of each dough circle. Leave a couple inches empty around the edge.

Photobucket
Fold over the egde as shown. The technique reminds me a lot of making a parchment paper pouch for cooking fish or something in the oven. Basically you just want to create a pretty pleated edge.

Photobucket
Dot with butter...mmm...

Then BAKE! VoilĂ !

Photobucket

My second one had a little hole in it and the juice spilled out...I love cleaning burned on sugar!
Photobucket
:-(

In conclusion: I think this is a great recipe because of the impressive presentation. The crust is easy to make, though I think my standard "perfect piecrust" recipe is a bit more flakey. The crust recipe I usually use is shortening based and this one is butter based so it's just a little different.

And now to do the dishes....!